Posts

Deploying SSL Certificate on Tomcat

Image
Download the Keystore Explorer from here as per your Operating System. Install the Keystore Explorer. Open the Keystore Explorer. Click on “ Create a new KeyStore ” and then select “JKS”. Now we will Generate Key Pair , by clicking on icon from below the screen. While Generating Key Pair, select RSA from the dialog and click on OK. A new dialog will appear, now click on in front of Name . Provide information in the dialog below, you can also provide domain name in place of IP address in Common Name and then click on OK. After providing all the information in step 7, it will look like this, verify details and click on OK. Now provide Alias name to Key Pair generated and then click on OK. Now provide New Password and Confirm Password for the Key Pair. Now your Key Pair is generated successfully . Now you can Save the Key Pair as .JKS file on the local disk. Now Generate Certificate Signing Request (CSR) file to create a certificate file by right-clicking on generated Key Pair....
How to deploy WAR file on Apache Tomcat

Image
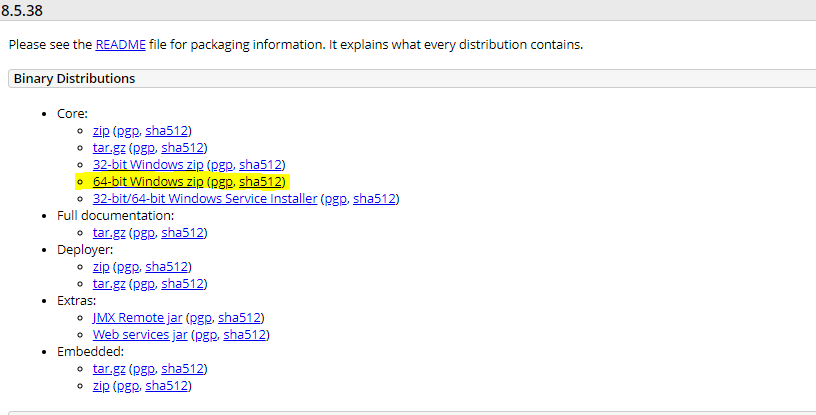
Some people sees deploying war file in Tomcat as Real WAR, but it is as easy as nothing. Today we will checkout how to deploy war file using Apache Tomcat in few easy steps. To Download & Install Java, refer my earlier blog . Download latest version of Apache Tomcat using link .  Once the zip file is downloaded, extract it to some directory location. For now we are extracting it to C:\tools  Now copy your war file into webapps directory under Apache-tomcat directory. Now start Tomcat server by double clicking on startup.bat located at bin directory under Apache-tomcat directory. Now access the application using web browser, Enter http://localhost:8080/helloworld  in address bar. Congratulations, you have successfully deployed WAR file using Apache Tomcat Server.

Install JAVA on Windows

Image
Download latest version of Java from link  by clicking on Accept License Agreement and selecting .exe file for JDK.   Once the .exe file is downloaded, double click on installer to start installation process. Click on Yes if installer asks for administrative permissions. Click on Next  Again click Next in next step and installation process will starts. Now click on Close, to complete your Java installation. Now we will set Environment variable for Java. To set environment variable search for environment variable in Start. Now click on Environment Variables.. .  Now add new variable in System Variables as JAVA_HOME and set value as home directory of Java.  Now add Java home path in variable PATH as follows and click OK Now open command prompt and check for java version, using command 'java -version'. Congratulations, JAVA is installed in your machine.

Installation of HMail Server

Image
Create your mail server in few easy steps, 1. Download the latest version of hMail Server from website https://www.hmailserver.com/download 2. Install the hMail Server in default directory location. 3. Now search for "hMailServer Administrator" in Start menu. 4. Now click on Add in Right hand side as shown in image. I have already added server name “localhost” . 5. Now in Server Information, Add Hostname, hMailServer Username(Here we are using Administrator) and enter select “Save Password” from radio button & enter password of your choice. 6. Now your server gets added to Server list, select your server and click on “Connect”. 7. Now password for server will be asked, Enter the password you have used in step 5. 8. Now after successful login to server, Administrator window will be opened. Here you have to Add domain to your server. 9. Add domain name of your choice in General and click on “Save”. 10. Domain gets added, now ...

Installation of Virtual Box for Virtual Machine

Image
Installation of Virtual Box(VM): Download VirtualBox from VirtualBox site ( https://www.virtualbox.org/ ) according to your host machine configuration. Install .exe file (VirtualBox-5.0.24-108355-Win).   Launch the VirtualBox. Select  New from the menubar. Now write Name for new Guest OS, Select Type, Select  Version. Select RAM size. Select Disk. Select Disk file type. Select Storage on HDD.(prefer Dynamic) Select Virtual Disk Size Now the Guest OS appears in the left hand side list. Right Click on our Guest OS and go to Settings. In Settings → Storage. In Storage Tree → Controller: IDE. Add new Optical Disk and add your Ubuntu .iso image file as IDE Primary Master. Then Click OK Now Double Click on new Guest OS, It will starts Installation of new Guest OS. Complete the Installation process of new Guest OS. After Installation Login to your account. Now you may face some GUI problems...